
Build a Minimal Auth App with Next.js and PostgreSQL: Step-by-Step Guide
A minimal authentication app is one of the best practical projects for learning modern full-stack web development. It combines the essential parts of a production-style system—user registration, password storage, login, session handling, protected pages, and security controls—without the overhead of a large framework or a third-party identity platform. If you can build a clean auth flow with Next.js and PostgreSQL, you will understand the core patterns behind most real-world applications.
This guide focuses on a minimal but realistic implementation using the Next.js App Router and PostgreSQL. The App Router is the recommended approach for new Next.js applications because it aligns with React Server Components, nested layouts, server actions, route handlers, and server-first data access patterns. That matters for auth because authentication logic often belongs on the server: password hashing, session creation, cookie handling, and route protection are all easier to reason about when the server owns the sensitive work.

The goal here is not to build a toy demo that only works locally. Instead, you will build a foundation that can be deployed, secured, and extended. We will keep the app minimal on purpose, but the design will leave room for common production needs such as OAuth sign-in, multifactor authentication, role-based access control, and better observability.
1. Introduction: What a Minimal Auth App Includes and Why App Router Is the Recommended Next.js Approach
A minimal auth app usually includes four core capabilities: account creation, sign-in, session persistence, and access control for protected pages. In a real application, that often expands into password reset, email verification, logout, profile management, and audit logging. But the heart of the system is simple: store users safely, verify credentials securely, and remember the user across requests without exposing secrets to the browser.
The Next.js App Router is the best starting point for this kind of app because it encourages a server-first architecture. Authentication is fundamentally server-side work. Your database operations, hashing, token creation, and session validation should stay off the client. With App Router, you can place these concerns in server actions, route handlers, or server components, depending on the use case. That keeps your implementation close to the data and avoids unnecessary client-side complexity.
The App Router also makes route organization intuitive. You can separate public pages like /login and /signup from authenticated sections like /dashboard, while using nested layouts to share navigation or auth guards. It also pairs well with form submissions and progressive enhancement. A login form can submit to a server action without you building a custom API layer first.
For a minimal auth app, this matters because it lets you build something small without painting yourself into a corner. The same patterns you use here—server-side validation, protected routes, secure cookies, and database-backed users—scale naturally into more advanced setups. If you understand this baseline architecture, you will have a strong mental model for building authentication in production-grade Next.js applications.
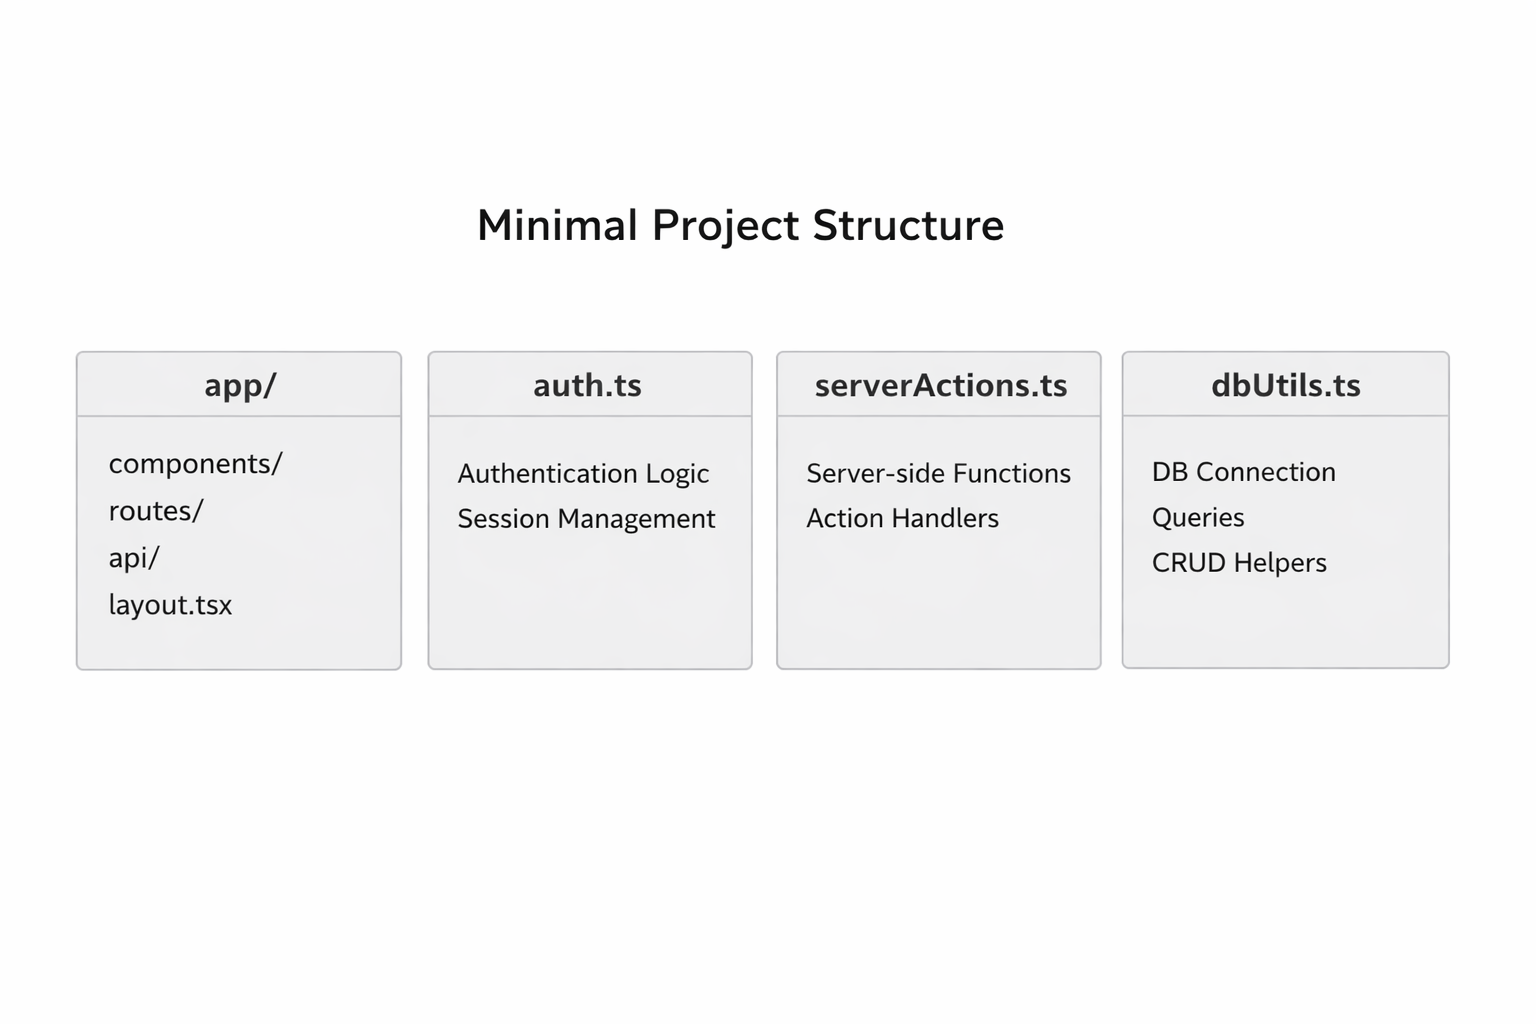
2. Project Setup: Create the Next.js App, Choose TypeScript, and Organize the App Router File Structure
Start by creating a new Next.js app with TypeScript enabled. TypeScript is a practical choice for auth-related code because it helps prevent bugs in user models, form payloads, session objects, and environment variable access. In auth code, small mistakes can become security or reliability issues, so stronger types are worth the setup effort.
A typical structure for an App Router auth app might look like this:
my-auth-app/
├── app/
│   ├── (auth)/
│   │   ├── login/
│   │   │   └── page.tsx
│   │   ├── signup/
│   │   │   └── page.tsx
│   │   └── layout.tsx
│   ├── dashboard/
│   │   └── page.tsx
│   ├── api/
│   │   └── auth/
│   │       └── route.ts
│   ├── layout.tsx
│   └── page.tsx
├── components/
│   ├── auth/
│   │   ├── login-form.tsx
│   │   └── signup-form.tsx
│   └── ui/
├── lib/
│   ├── auth.ts
│   ├── db.ts
│   ├── password.ts
│   └── validators.ts
├── prisma/ or migrations/
├── .env.local
└── package.json
The exact structure can vary, but the principle is consistent: keep route-specific UI in app, reusable code in lib, and form components in components. Group public auth pages separately from authenticated routes. If you use a route group like (auth), you can share a dedicated layout for login and signup pages without affecting the rest of the app.
The App Router encourages a clean separation between server and client concerns. Pages can fetch server data directly. Server actions can live next to the forms that use them. Route handlers can expose JSON endpoints if you need them, though for a minimal auth app you may not need many API routes at all. That is one of the benefits of this model: you can start with server actions and add route handlers only where they provide value.
A good setup also includes basic tooling: ESLint, Prettier, and a database client. If you plan to use an ORM such as Prisma or a query builder like Drizzle, install that early so your schema and application code evolve together. Auth flows touch nearly every layer of the stack, so establishing the structure up front saves time later.
3. Database Design: PostgreSQL User Table, Password Hashing, and Environment Variable Setup
Your PostgreSQL schema should be intentionally small at first. For a minimal auth app, the user table usually needs an id, email, password hash, and timestamps. Depending on your needs, you may also store a role, email verification state, or a username. The key principle is to store only what you need and keep the sensitive parts hashed rather than reversible.
A simple user table might include:
id: primary keyemail: unique and indexedpassword_hash: bcrypt or Argon2 hashname: optional display namecreated_at: timestampupdated_at: timestamp
The most important design decision is how you handle passwords. Never store raw passwords, even temporarily in the database. Instead, hash them before inserting the record. Bcrypt remains a common choice for minimal auth systems because it is widely understood, easy to use, and designed specifically for password hashing. You can also use Argon2 in modern setups if your dependencies and environment support it. Either way, your app should compare only hashes, never plaintext credentials.
Environment variables should hold all secrets and environment-specific values. At minimum, you will usually need:
DATABASE_URLfor PostgreSQLAUTH_SECRETor a similar session/signing secretAny provider-specific OAuth credentials if you add them later
Optional app base URL for redirects
Keep these values in .env.local for local development and inject them into your deployment environment separately. Do not hardcode secrets in source files. Also avoid checking .env.local into version control. The database URL often includes credentials, host information, and database name, so it should always be treated as sensitive.

If you use an ORM, define the schema in code and generate migrations. If you use raw SQL, create a migration file that defines the user table and indexes. Make the email column unique so duplicate accounts are rejected at the database layer, not just in application logic. That gives you a second line of defense against race conditions.
One practical recommendation: normalize email addresses before storing them. Lowercase them, trim whitespace, and validate that the format is reasonable. This avoids subtle duplication issues such as User@Example.com and user@example.com being treated as different accounts.
4. Authentication Strategy: When to Use Auth.js vs. a Custom Credentials Flow, and Why Libraries Are Recommended
For a minimal auth app, you have two broad options: use an established authentication library such as Auth.js, or implement a custom credentials flow. Both are valid, but they serve different goals.
Auth.js is the safer choice when you want a well-supported authentication layer with built-in patterns for sessions, providers, callbacks, and integrations. It reduces the amount of security-sensitive code you have to write yourself. It also helps when you plan to support multiple sign-in methods, such as email/password plus Google or GitHub OAuth. Because auth is easy to get wrong, using a library tends to be the best default decision for production work.
A custom credentials flow can make sense when your use case is very specific or you want to learn the mechanics of authentication in depth. For example, you might want a tiny internal tool with only email/password login, or you may be experimenting with a bespoke session model. In that case, you can create your own login route, hash password verification, and cookie-based session token logic. The tradeoff is that you own all the details: cookie flags, expiry, rotation, CSRF protection, and edge cases around invalid sessions.
For most teams, the recommendation is simple: use a library unless you have a strong reason not to. A mature auth library provides a battle-tested foundation, fewer footguns, and easier future expansion. A custom flow is educational, but it also increases maintenance burden and security risk. If your aim is to ship a reliable app, libraries usually win.
That said, understanding a custom credentials flow is still valuable. Even if you eventually adopt Auth.js, you will make better decisions if you know what is happening behind the scenes. You will understand how sessions are created, why cookies need secure settings, and where to place authorization checks. That knowledge is especially useful when debugging sign-in issues or extending authentication beyond the basic path.
5. Sign-Up Flow: Form Validation, Server Actions or Route Handlers, and Inserting Hashed Users into PostgreSQL
The sign-up flow begins with the form. Your signup page should collect at least an email and password, and optionally a name. Before anything touches the database, validate the input on the server. Client-side validation improves UX, but server-side validation is the real security control because the client can always be bypassed.
A practical validation layer should check:
email format
password length
password confirmation if included
trimmed strings
normalized casing for email
basic anti-abuse rules, such as required fields and maximum lengths
With App Router, server actions are a natural fit for this flow. A signup form can submit directly to a server action, which receives the form data, validates it, hashes the password, and inserts the user into PostgreSQL. That keeps the logic close to the UI and avoids building a separate API endpoint unless you need one. Route handlers are also fine, especially if you want JSON responses or plan to reuse the endpoint from other clients.
A standard sign-up sequence looks like this:
User submits the form.
Server validates input.
Server checks whether the email already exists.
Server hashes the password.
Server inserts the new user.
Server redirects to login or auto-signs the user in.
When inserting a user, handle duplicate emails gracefully. Even if you check first, another request can race and create the same email at the same time. The database unique constraint is the final authority. Catch that error and return a friendly message like “An account with this email already exists.”
The password hash should be generated on the server with a proper hashing library. Use an appropriate work factor for your environment so hashing is slow enough to resist brute-force attacks but not so slow that it harms user experience. Store the resulting hash string in the database and never the original password.
A minimal implementation often feels straightforward, but the sign-up flow is where foundational security habits are established. Validate, hash, insert, and fail safely. If you get those four pieces right, the rest of the auth system becomes much easier to trust.
6. Sign-In and Session Management: Credential Verification, Session Persistence, and Cookie-Based Auth
Sign-in is the process of proving identity and establishing a session. In a credentials-based flow, the user submits an email and password. Your server looks up the user record, compares the submitted password to the stored hash, and creates a session if the credentials match. The session is then persisted so the user does not need to log in again on every request.
Cookie-based auth is the standard approach for server-rendered web applications. After successful login, the server sets an HTTP-only cookie containing either a session token or a signed session reference. The browser includes that cookie automatically on future requests, which allows the server to identify the user without exposing tokens to client-side JavaScript. HTTP-only cookies are especially valuable because they reduce the risk of token theft from XSS attacks.
A minimal session strategy can work in one of two ways:
Database-backed sessions: store a session record in PostgreSQL and keep only a session id in the cookie.
Signed token sessions: store a signed, time-limited token in the cookie and verify it on each request.
Database-backed sessions are often easier to revoke and inspect. Signed tokens can be simpler in some cases, but they require careful handling of expiry and rotation. For a minimal app, either pattern can work if implemented carefully. The important thing is to keep the cookie secure and the session lifecycle clear.
When verifying credentials, compare the password with the stored hash using the password library’s safe comparison method. Never compare plaintext strings directly. If the password is correct, create a session and redirect the user to the dashboard or home page. If not, return a generic error message. Avoid revealing whether the email exists, since that can aid account enumeration.
Session management also includes logout. On logout, clear the cookie and invalidate the session if you store sessions in the database. Good systems also support expiry, so inactive sessions eventually disappear. For a minimal app, you can keep the initial expiration simple, then add rotation and refresh logic later if needed.
7. Protected Routes and Authorization: Gating Dashboard Pages, Redirect Logic, and Server-Side Route Protection
Authentication answers the question “Who are you?” Authorization answers “What are you allowed to access?” In a minimal app, the first authorization rule is usually simple: signed-in users can access dashboard pages, signed-out users cannot.
With the App Router, protected routes are best enforced on the server. Do not rely only on client-side checks, because those can be bypassed. Instead, verify the session in server components, layouts, or middleware-like route logic, then redirect unauthorized users before rendering sensitive content.
A common pattern is to wrap protected pages under a /dashboard route segment and check the session in a server layout or page. If no valid session exists, redirect to /login. If the session is valid, render the dashboard content. This keeps the authorization boundary at the server layer, where it belongs.
Redirect logic should also protect auth screens. For example, if a logged-in user visits /login, you may want to send them to /dashboard instead of showing a redundant login form. That creates a smoother user experience and prevents confusion.
You can apply authorization at different levels:
Page-level protection: useful for individual routes
Layout-level protection: useful for entire sections like dashboard areas
Action-level protection: useful for server actions that mutate data
API-level protection: useful for route handlers and internal endpoints
The deeper the protection, the better. Even if a page is blocked, make sure related server actions and APIs also verify the session before executing. Never assume the UI is the security boundary.
For role-based access, you can expand the user record with a role field such as user or admin. Then you can enforce additional checks on specific routes. For example, an admin panel may require both a valid session and an admin role. That becomes the foundation for more advanced authorization models later.
8. UI and UX Essentials: Login/Signup Forms, Loading States, Errors, and Navigation Between Auth Screens
A minimal auth app still needs good UX. Authentication is one of the most frequently used interactions in a web app, so small usability issues quickly become frustrating. Clean forms, clear errors, and obvious navigation matter as much as the backend logic.
Start with simple login and signup forms. Keep labels visible, use the right input types, and avoid asking for unnecessary information. Email and password are enough for the first version. If you include a name field, make it optional unless the app truly needs it. Password fields should support autocomplete hints such as new-password for signup and current-password for login.
Loading states are important because auth requests often involve hashing and database access. Disable the submit button while a request is in progress and show a clear indicator that the request is being processed. This prevents duplicate submissions and makes the app feel more responsive.
Error handling should be specific enough to be useful, but not so specific that it leaks sensitive information. For example:
“Invalid email or password” is good for login.
“Password must be at least 8 characters” is good for signup.
“An account already exists for this email” is acceptable during registration.
For navigation, users should easily switch between login and signup screens. Place clear links under each form, and make sure redirects are consistent after a successful sign-in or sign-up. If a logged-in user lands on a public auth page, redirect them away automatically.
Accessibility deserves attention as well. Use proper labels, associate error messages with fields, and ensure focus states are visible. Keyboard navigation should work naturally. If you are using server actions, remember that forms can still be accessible and progressive-enhancement friendly as long as the markup is semantic.
A good auth UI is calm and predictable. Users should always know what happened, what to do next, and whether the system accepted their action. That sense of clarity is part of security too, because it reduces mistakes and repeated failed attempts.
9. Security Checklist: Bcrypt, Input Validation, CSRF Considerations, Secret Management, and Rate Limiting
Authentication code deserves a security checklist, even in a minimal app. The goal is not paranoia; it is disciplined engineering. A few small safeguards eliminate entire classes of avoidable problems.
First, use a strong password hashing algorithm such as bcrypt or Argon2. Never hash passwords with a fast general-purpose function like SHA-256 by itself. Password hashing must be deliberately slow to make brute-force attacks expensive.
Second, validate every input on the server. This includes login and signup fields, but also any profile updates or auth-related actions later. Validation should enforce type, length, and structure. Treat the client as untrusted, because it is.
Third, think about CSRF. If your app uses cookie-based auth and accepts state-changing requests, you should consider CSRF protection. Some frameworks and auth libraries reduce the risk by using SameSite cookies, origin checks, or built-in anti-CSRF mechanisms. If you implement a custom flow, make sure you understand which protections are active and which are not.
Fourth, manage secrets carefully. Keep database credentials, session secrets, OAuth client secrets, and any signing keys out of source control. Use environment variables locally and in deployment environments. Rotate secrets when needed, especially after suspected exposure.
Fifth, add rate limiting or abuse protection to login and signup endpoints. Even a simple limit can reduce brute-force attempts and automated sign-up spam. You can rate-limit by IP, by account identifier, or both. If your app is public-facing, this becomes increasingly important.
Other useful safeguards include:
setting secure, HTTP-only cookies
using HTTPS in production
storing minimal session data
expiring inactive sessions
logging auth failures carefully without exposing secrets
preventing account enumeration where possible
Security is not one feature; it is a set of defaults. If you start with safe primitives and a cautious design, the auth system becomes much easier to maintain over time.
10. Deployment and Next Steps: Deploy to Vercel, Connect PostgreSQL, and Extend to OAuth, MFA, and Role-Based Access
Once the app works locally, deployment becomes the next milestone. Vercel is a natural choice for Next.js applications because it supports the framework well and simplifies deployment of App Router projects. Your main deployment tasks are usually connecting the repository, setting environment variables, and ensuring the database is reachable from production.
For PostgreSQL, choose a managed provider that fits your stack and traffic expectations. The key requirement is a stable connection string and predictable access from your hosted app. After provisioning the database, migrate your schema and verify that the application can read and write user records in the production environment. Be careful to test both signup and login after deployment, because database connectivity issues often show up only after the app is live.
Environment variables must be configured in the deployment platform as well. Your local .env.local file is not enough. Make sure the production secret used for sessions or cookie signing matches your deployed configuration. If your auth system depends on a base URL, set that correctly too so redirects work on the live domain.
After the first deployment, the natural extensions are straightforward. OAuth lets users sign in with identity providers such as Google or GitHub, which can reduce password friction. MFA adds another layer of account protection and is especially important for sensitive applications. Role-based access control lets you differentiate between ordinary users, moderators, and admins. You can also add email verification, password reset flows, account deletion, and audit trails.
The most valuable next step is usually not adding every feature at once, but strengthening the foundation. Start by making the login experience robust, sessions reliable, and route protection airtight. Then layer on additional identity methods and authorization logic as your app grows.
A minimal auth app is a deceptively rich project. It teaches database design, server-side security, UX, and deployment in one compact system. If you can build it well, you have learned patterns that transfer directly to almost every serious web application.
Conclusion
A minimal auth app built with Next.js and PostgreSQL gives you a practical foundation for modern web development. The App Router provides a server-first architecture that fits authentication naturally, while PostgreSQL gives you a reliable store for user records and sessions. By keeping the first version focused on signup, login, protected routes, and cookie-based sessions, you can build a system that is small enough to understand yet realistic enough to deploy.
The main takeaways are simple: validate on the server, hash passwords before storing them, protect routes on the server, keep secrets out of source control, and use libraries when they reduce security risk. From there, you can extend the app with OAuth, MFA, and role-based authorization without rewriting the core architecture.
If you build the minimal version carefully, you are not just making a demo—you are creating a secure baseline that can evolve into a production auth system.